Top Tips for Neurology Examinations

Neuro exams are hard. They incorporate a long sequence of manoeuvres that require good communication and patient cooperation, and the signs can often be subtle. The following covers the author's own top tips which have been accumulated over the years to increase the diagnostic yield of the examination and most recently got him through his MRCP PACES exam. It is hoped that these practical tips can be used to refine your own neurological skills and extract maximum clinical value.
1. Don’t Miss End-of-the-Bed Clues
The neurological examination starts the moment you enter the room, often offering valuable information before you even begin the formal assessment. Take a step back and observe the patient’s general appearance, mobility and behaviour as you move to greet the patient. For example, a wheelchair or crutches might suggest a more widespread neurological disease than the initial complaint or exam brief implies. Similarly, an eye patch, cane or guide dog(!) could hint at recent visual disturbance or cranial nerve involvement. Observe for asymmetry, tremors, involuntary movements or postural abnormalities, all of which can guide your examination. Take note of how the patient greets you; a patient with a characteristic scanning dysarthria of cerebellar disease or hypomimia of Parkinson's should draw the clinician towards specific diagnoses, even if the referral was just to assess their arms. These clues not only help narrow down potential diagnoses but also inform you about the extent and chronicity of the disease. They allow you to approach the examination with a targeted mindset, making your findings more meaningful.
2. Tone: Test with Varied Velocity
Assessing muscle tone is a fundamental part of the neurological examination, as it helps distinguish between different types of motor dysfunction. Unfortunately, I often encounter medical students who (wrongly) assume that they are either looking for 'increased' or 'decreased' tone. It is important to be clear on the key abnormalities of tone one is assessing for:
Spasticity, which is velocity-dependent, is typically associated with upper motor neuron lesions, such as those seen in stroke or multiple sclerosis. In contrast, rigidity, which is not velocity-dependent, points to extrapyramidal disorders like Parkinson’s disease.
To accurately evaluate tone, ensure the patient is fully relaxed and move their joints passively at varying speeds. For example, flex and extend the elbow or knee slowly, then more quickly, to elicit spasticity if present. If stiffness is present throughout, this is rigidity. It is crucial to differentiate these findings, as they have vastly different implications for the underlying pathology. Unfortunately 'increased tone' alone doth butter no parsnips in the world of neurology.
3. Assess Power Joint-by-Joint
Accurately assessing muscle power requires careful technique to avoid misleading results. I often find myself getting quite frustrated with students who - perhaps trying to rush through the exam - try to assess the power of both limbs at once. This is pitfall is particularly common when examining the upper limbs. There are two main problems with this:
- The clinician is less likely to spot subtle differences between sides
- Joints are not examined individually
Testing power should involve isolation of each joint to ensure that you are evaluating the muscle group in question without assistance from other parts of the limb or leverage. If there is a focal deficit present, the patient may very be used to compensating by using adjacent, unaffected, muscles group. Be mindful also of your technique giving the patient an unfair advantage or disadvantage. For instance, when assessing hip flexion, apply resistance directly to the thigh rather than pushing on the distal leg, which could engage additional muscle groups and give the examiner a mechanical advantage. Similarly, when testing knee flexion, lift the patient’s heel off the bed to minimise friction that might artificially enhance perceived strength.
Always grade power using the MRC scale (0–5), being mindful of subtle asymmetries or differences between muscle groups. These nuances can be critical, as they may help localise lesions to specific nerve roots, peripheral nerves, or the spinal cord. Proper technique in power testing ensures you gather reliable, meaningful data.
4. Reflexes: It’s All in the Wrist
Eliciting reflexes effectively depends on proper preparation and technique. Reflex arcs require the tendon to be appropriately stretched across the joint for the best response, so ensure the limb is positioned correctly before you begin. The tendon hammer is the neurologist's best (and probably only) friend. A Queen’s Square hammer is typically the tool of choice, as its design allows for precision and consistency compared to other models. When striking, use your wrist to create a controlled, pendulum-like motion, relying mostly on gravity to deliver a clean and reproducible strike. Avoid excessive force, which can obscure findings or cause discomfort. Reflexes provide critical information about the integrity of specific segments of the spinal cord and associated peripheral nerves. Proper technique not only increases your confidence in eliciting reflexes but also ensures you obtain the best diagnostic yield from this essential component of the neurological examination.
And for goodness sake please never use the sharp end of the tendon hammer to elicit a Babinski reflex! This can break the skin which is not a great idea if it's been jabbed into the feet of 100s of patients previously…yum.
Eric Strong has an excellent guide to the art of eliciting deep tendon reflexes:
5. Coordination: Go Beyond the Basics
Coordination testing is more than just assessing smooth and accurate movements; whilst standard tests like finger-to-nose or rapid alternating hand movements are helpful, adding more dynamic tasks such as repetitive finger 'snaps' (apposition of forefinger and thumb) or hand snaps (opening and closing a fist) can reveal subtle abnormalities. The author likes to add these on to the end of the coordination assessment. These tests assess not only coordination but also categorical features: rhythm (which can be disrupted in cerebellar dysfunction), amplitude (reduced in any form of weakness), frequency (reduced in the bradykinesia of Parkinson’s disease), and change over time (amplitude reducing over time in myasthenia gravis - i.e. fatiguable weakness - or improving in Lambert-Eaton syndrome). Incorporating these additional tests allows for a more detailed assessment of motor control and can help differentiate between cerebellar, extrapyramidal, or neuromuscular causes of dysfunction. By expanding your coordination testing repertoire, you gain valuable information that goes beyond the simple localisation of cerebellar pathology and allows for differentiation from mimics.

6. Sensation: Be Thorough and Methodical
Assessing sensation requires precision and consistency to uncover meaningful findings. There are a number of ways to increase diagnostic yield:
Firstly, the basics of assessing any sensory modality; begin by using the upper chest as a reference point for normal sensation for whichever part of the body is being examined. Ensure the patient closes their eyes to avoid visual cues. When testing, always compare findings side-to-side and note whether deficits follow a length-dependent pattern (suggestive of peripheral neuropathy) or a dermatomal distribution (indicating radiculopathy). Normally students are taught to assess in dermatomes but if a deficit is found, go back to re-assess from distal to proximal to check for length-dependence.
For light touch, use cotton wool gently, ensuring not to brush hairs, which stimulates different fibres in the spinothalamic tract (not what is being tested for).
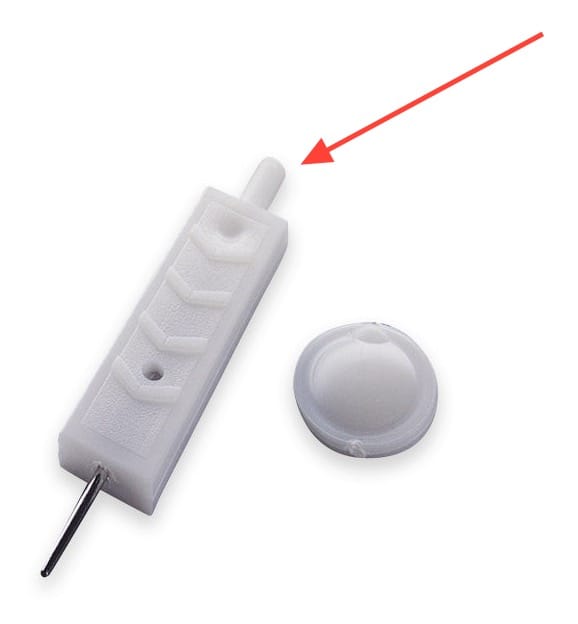
Pain testing with a neurotip should include alternating sharp and blunt ends (yes, that is what the blunt end is for!), asking the patient to identify which is which; a misinterpretation, such as describing sharp as dull, may indicate a significant positive finding. If you only use the sharp end and only ask the patient if they can feel it (which they still can), you will miss out this subtle sensory loss.

To assess vibration, use a 128Hz tuning fork (some mean examiners will provide a choice of tuning fork and expect the candidate to choose the correct one), ensuring you isolate the joint. Pinch and release the fork to generate a vibration with minimal sound (ideally don't just strike it), place it upon the joint and ask the patient to tell you when they feel it buzzing and then when they feel the vibration has stopped (by you muffling it with your fingers. Move up the joints distal to proximal and stop when the patient can consistently identify the vibration’s cessation.
To reiterate: ensure that for each of these you a. are using the upper chest as a reference to begin with. b. make sure the patient has their eyes closed.
Proprioception should be tested by holding the joint at its sides to avoid position hints and moving up and down. Move from distal to proximal, again stopping when then patient gets this correct.
For efficiency, aim to test both the dorsal columns (e.g. vibration or proprioception) and the spinothalamic tract (e.g. pain) in your examination. If time is limited, you don't need to include all of them. The author's own approach was to just assess dorsal columns with a tuning fork and spinothalamic tract with a neurotip which was time-saving but gave enough information to localise a lesion.
Summary
A good neurological examination relies on observation, precision and good technique. By focusing on end-of-the-bed clues, testing tone with varied speeds, isolating joints for power, refining reflex and coordination testing and being thorough with sensation, you can extract more meaningful findings. These small refinements should not only improve diagnostic accuracy but also make your examination more efficient and impactful. Happy examining!


